Applying Your New Motocal Decals
Applying Your New Motocal Decals
Your vehicle and your decals are ready for installation and it’s time to apply your graphics to give your machine a facelift!
Ensure you wipe down all the surfaces that you will apply decals to. Use an alcohol based solution (unmixed gasoline will work). Allow time for this to evaporate before application. If there is grease, dirt or dust, the decals will not stick correctly because it will be sticking to the layer of dirt. If you attempt to stick the decal with a layer of grease and only notice that the surface wasn’t cleaned properly there is a good chance you have damaged your decal and it will not stick properly. This is why it’s very important you clean the surface properly before applying each decal. It’s the secret to graphics looking great.
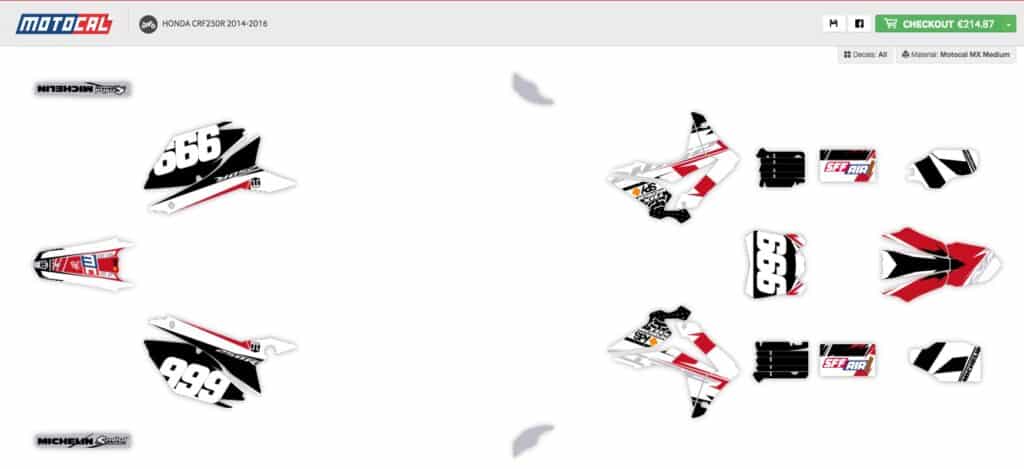
You should use Motocal’s unique vehicle layout (The design layout on screen or the design layout with your confirmation email at time of purchase). This will act as a legend to ensure you put the correct decal on the correct part of the vehicle. If you have a tablet at the time of fitting you can simply click each decal to see it’s name and hence where it goes.

Removing Non-Visible Decal Material
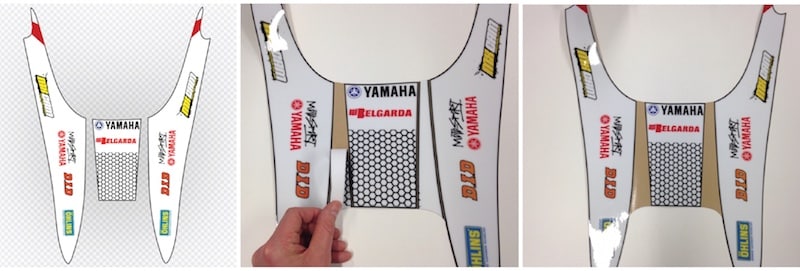
Please note when your decals are shipped you will receive part of the decal that is not designed to be stuck onto the vehicle. These are not part of design. These can be complex design lines that are not part of your design and don’t need to be adhered to the vehicle as you see in the illustration below.
- !mage 1 - Finished decal on Motocal with 3 clear sections
- Image 2 - Printed decal with excess material not to be used or applied to your vehicle. Remove all excess material.
- Image 3 - Decal with no excess material. This decal now matches image 1 and is ready to be applied to your vehicle.

Lining up decals
Before removing the backing paper of each decal it is important to line up the hole and noticeable curves to ensure you align the decal properly before you start the application. Apply each decal individually.
You can remove the decal many times in the adhesion process but you must ensure you don’t stretch the decal (by pulling to roughly) when removing it for correct re-alignment.
It’s helpful to apply the centre strip of the decal and slowly ease out the decal to the extremities of the plastics. If you gently ease the decal out from the centre with your fingers it can give the decal the heat it needs to stretch the necessary amount to perfectly conform. Only do this when you are sure you have the decal correctly aligned with the plastics. You can peel back the decal to remove any air bubbles that might appear during the installation.
Apply Heat
When you are completely happy with the decal installation you can apply gentle heat (not too much) over the decal with a hair dryer (heat gun not recommended as provides too much heat) to help the decals take the shape of the plastics.
You can also use heat when applying thicker materials but be careful as you don’t want to warp/distort the shape of the decals so they can’t fit your vehicle.
Your decals should now be perfectly applied.
ORDER NOW & SHIP FREE TODAY
Design your graphics online today and Motocal will ship them for free today to you.
